
Announcements

Announcements are used to deliver service-related news or notifications to the users of the service portal in different system languages. They are displayed on the portal and/or sent via email.

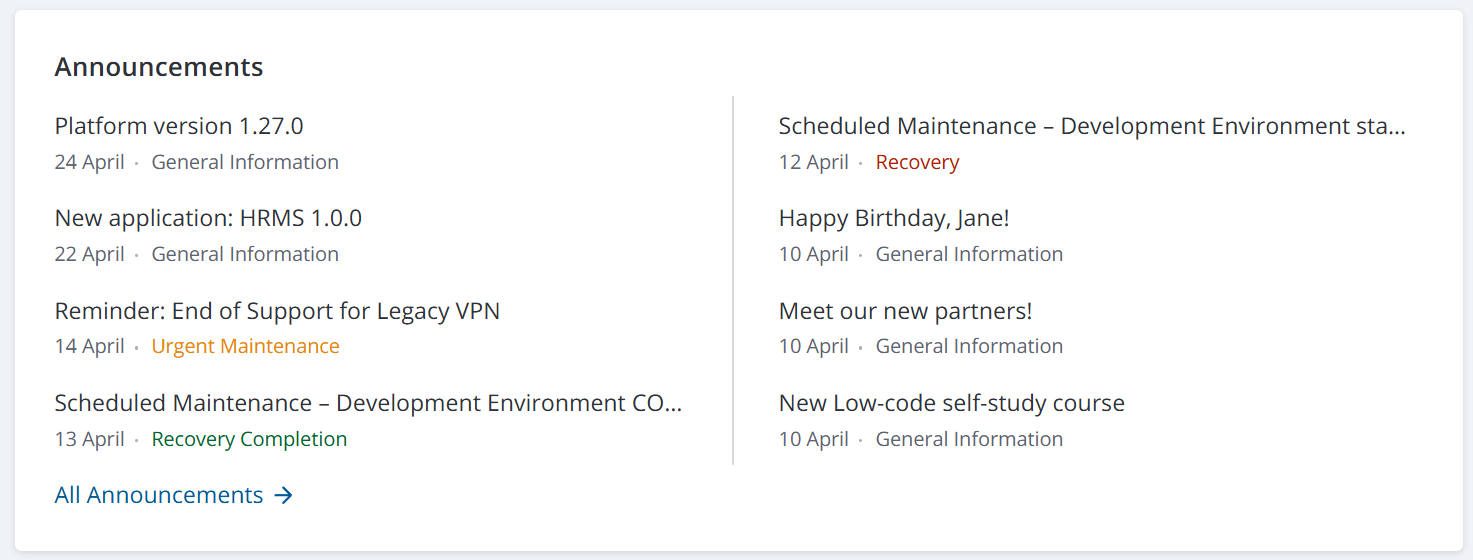
When displayed on the portal, the announcement list is located in the Announcements area that is shown below:

Announcement types


There are five announcement types in SimpleOne. They are used to categorize announcements based on the information they provide.

Announcement TypeDescription
RecoveryInforms that some service or CI recovery activities have been started.
Recovery completionInforms that some service or CI recovery activities are over.
MaintenanceInforms about updates, backups, or maintenance.
Urgent maintenanceInforms about an unexpected breakdown.
General informationShows notifications.
tip

You can customize the highlights of the announcement type and the view of the announcement widget on the service portal. You can also customize the announcement highlight in the agent interface. See the Style Rules article to learn more.

Create an announcement


tip

Roles required: announcement_manager or admin.

To create an announcement, complete the steps below:

  1. Navigate to Service AnnouncementsNew Announcement.

  2. (optional) Click Create from template to select an appropriate template and fill in the announcement form with its values.

  3. Fill in the fields or edit the values as needed if the announcement was created from a template.

    tip

    The added attachments to the record will be available for download on the announcement page in the self-service portal.

  4. Click Save or Save and exit to apply the changes. The record will be saved in the Draft state.

  5. (optional) If the workflow implies a mandatory approval, change the announcement state to Review and wait until it is completed.

  6. Set the Published state and click Save or Save and exit to publish the article in the self-service portal and email it if via Email checkbox has been selected.

warning

Before you save an announcement in the Published state, ensure the via Email checkbox value is the one you need.

  • You cannot abort email process after the record is saved in the Published state for the first time.
  • Announcement is emailed only once – after the announcement record is saved in the Published state for the first time. If you save the record in the Published state and with the checkbox cleared (the announcement is not emailed), the announcement will not be sent later if you select the checkbox and save the form again.

Access to announcements

By default, announcements are not available for unauthorized users on the Self-Service Portal.

To make it possible to share an announcement link with your partners and clients who do not need to log into the system to read it, select the Public checkboxes in relevant records:

  • Announcement portal page record in the Page (page) table.
  • Announcement widget instance record in the Widget Instance (sys_widget_instance) table.
note

If a page contains several widgets, you should allow access to all of them. Otherwise, the system will display an empty page.

As a result:

  • Unauthorized users follow a link to a published announcement, they can read it without logging in.
  • Unauthorized users can open other records displayed in the Last Announcements widget.

Announcement form fields

FieldMandatoryDescription
NumberYThe announcement number. This field is populated automatically and has the ANCMXXXXXXX format. It is always read-only.
StateY

The announcement state. Available options:

  • Draft – the announcement is just created.
  • Review – the announcement must be reviewed. After the state is changed to Review, the approval emails are sent to all emails specified in the Reviewer’s Email field.
  • Published – the announcement is displayed on the service portal and/or sent via email.
  • Inactive – the announcement is inactive.

Only active announcements {state IS Published via AND Portal IS Yes} are displayed to the portal users.

TypeY

Select the announcement type. Available choice options are:

  • Recovery
  • Recovery completion
  • Maintenance
  • Urgent maintenance
  • General information
ServiceYSpecify the related IT service.
Recipient emailsNSpecify the emails of the recipients of the announcement. You can enter multiple emails separated by commas.
Reviewer emailsNSpecify the emails of the reviewers of the announcement. You can enter multiple emails separated by commas.
SubjectYType the announcement subject.
ContentNType the announcement body in rich-text format. Design the announcement body using the built-in editor functionality, such as formatting, working with tables and media, lists, styles, and headings.
via EmailNSelect this checkbox to send this announcement via email. It will be sent to all addresses specified in the Recipient Email field.
via PortalNSelect this checkbox to display this announcement on the Service Portal in the Portal Announcements area.
SignatureNAdd a signature to appear in the announcement caption. See the Announcement Signature section to learn more.
DescriptionNAdd a short announcement description. It is not shown to the users of the service portal.
  • Announcement localizations – the list contains records of the translated announcement. The list displays the translation language set by default.
  • Announcement template – the list contains the template record that the announcement is created from.

Create an announcement signature


The announcement signature is a customizable block containing text and/or media. In this block, you can place a signature of your announcement and bind it to a new announcement you created in the appropriate field.

To create an announcement signature, complete the steps below:

  1. Navigate to Service AnnouncementsSignatures.
  2. Click New and fill in the fields.
  3. Click Save or Save and exit to apply the changes.

Announcement signature form fields

FieldMandatoryDescription
NameNSpecify a name for the announcement signature.
BodyYType a signature message. Design the signature body using the built-in editor functionality, such as formatting, working with tables and media, lists, styles, and headings.

Below you can see an example of an announcement with a signature set on the Portal:

Announcement templates

An announcement template is an announcement form with pre-filled field values. The template name is the value specified in the Subject field. Use templates to reduce the time spent filling out announcement form fields and updating their content. For example, if your organization has a standardized structure for certain types of announcements, save it as a template so that you can update or supplement it with only the necessary information.

caution
  • Applying a template will overwrite the form fields and existing translations of the announcement.
  • Applying a template is not available in the Published state.
  • Announcements inherit all attachments from the applied templates. They will be available for download on the self-service portal after publishing.

You can create translations of announcement templates for the languages available in the system. To do so, specify the name of the current announcement template in the new Announcement Localization form and add its translation in the target language. When you create an announcement from this template, related announcement translation records will be created in the Draft state. The Original announcement field on the form will show the current announcement records, not the applied template.

To use a template for a new announcement, follow the steps below:

  1. Navigate to Service AnnouncementsNew announcement.
  2. Click Create from template in the top-left corner of the form.
  3. In the modal window that opens, select a template name (the value specified in the Subject field of the template record) and click Create. The created announcement record will contain fields completed with the values from the applied template and will be in the Draft state.
  4. Make any necessary changes to the announcement body and other fields, then continue working with it as usual.

Announcement template form fields

FieldMandatoryDescription
NumberYThe announcement template number is created automatically and consists of a prefix ANT and the record number in the table. For example, ANT0000001.
StateY

The announcement template state. Available options:

  • Draft – the record enters this state after it is saved for the first time. The template is unavailable for use.
  • In use – the template is available for use.
  • Archived – the template is unavailable for use.
TypeY

Select the announcement type of the template. Available options:

  • Recovery
  • Recovery completion
  • Maintenance
  • Urgent maintenance
  • General information
ServiceYSpecify the related IT service.
Recipient emailsNSpecify the emails of the recipients of the announcement created from this template. You can enter multiple emails separated by commas.
Reviewer emailsNSpecify the emails of the reviewers of the announcement created from this template. You can enter multiple emails separated by commas.
SubjectYType the announcement template subject. This value is used as the template name in the templates list.
ContentNAdd the content using the necessary formatting and attachments.
SignatureNAdd a signature to appear in the announcement created from the template. See the Announcement Signature section to learn more.
DescriptionNA a short description of the template. For example, specify when this template must be used, or add some instructions on how to configure the final announcement created from this template.
via EmailNSelect this checkbox to send the announcement created from this template via email.
via PortalNSelect this checkbox to display this announcement created from this template on the Service Portal.

Localize announcements and announcement templates

You can create translations of announcements and their templates in any language available in the system. All translation records are stored in the Announcement Localization (announcement_localization) table. To view the list, navigate to AnnouncementsTranslations.

Create a localization record


There are two ways to create a translation:

  • click Create translation on the required announcement form.
  • click New in the list interface of the Announcement Localization table.

On the Announcement Localization form, there is a related list titled Announcement Localizations. It contains translation records of the original announcement translated into other languages.

note
  • The language used for sending announcements and displaying them on the portal is the same and is defined in the announcement.language.source system property.
  • If the Type field of an announcement does not have a translation into the required language, its English value is used.
  • If multiple translation records are created for the same announcement in the same language, the system uses the record that was last updated.

To create a translation of an announcement, click Create translation on the announcement form. Then, in the newly opened window, follow the steps below:

  1. Select the language of the translation you want to add.
  2. Add the translated text of the announcement and complete the remaining fields.
  3. Click Save or Save and exit to save the translation record.

Announcement translation form fields

FieldMandatoryDescription
SubjectYSpecify the announcement title in the language selected in the Language field.
Original announcementY/N

A reference to the original announcement record. The field is completed automatically if the translation record is created from the announcement form.

The field is unavailable if the Announcement template is specified.

Announcement templateY/NSpecify the template for which the translation is created.
SignatureNSpecify the signature record in the selected Language.
ContentYAdd the translation of the original announcement body in the Language field.
LanguageYSpecify the language of this translation.
Use by defaultNSelect the checkbox to use the translation by default in cases described below.

Default language

If no translation records have been created yet, the language used in the original announcement is considered the default one. When you create translations, you can specify which one should be used as the default one.

The announcement in the default language will be sent to users by email and displayed on the portal if:

  • the recipient specified in the mailing list does not have a user account in the system.
  • the system does not contain a translation of the announcement in the language specified in the user’s Interface language or Notification language fields in their preference settings. The mailing language is determined in the announcement.language.source system property.