ITSM Telegram Bots
Telegram is a messaging application that enables integration with various systems using chatbots.
The ITSM Telegram bots can be assigned for various business needs and serve the following purposes:
- Create incidents and user queries.
- View incidents and user queries.
- Leave comments.
- Provide additional information for the requests in the state Information needed.
- Approve and reject requests.
- Cancel requests and evaluate the agent's work and the service.
- Conduct swarming sessions to speed up work on major incidents.
Connect a bot to your instance
Required role: admin.
The ITSM solution has two kinds of bots:
- For agent/For client – a bot that is configured to allow customers to create and view requests, approve items, and other.
- Router – a bot that is responsible for creating groups for swarming sessions and sending messages between the group and the instance.
To connect to the preset bots, complete the following steps:
-
Go to the Preferences menu → Application, select ITSM from the dropdown list.
-
Go to ITSM Telegram Bot → Bot connection page.
-
In the Disconnected section, select the required bot type.
-
Follow the instructions on the page. Save a username (@username_bot) and a name of the new bot.
-
Complete the steps and click Set.
noteUse an instance with an open to public URL, to enable Telegram server connection to the instance. Otherwise, an error occurs.
-
In the Telegram application, find the created bot using its name or username.
-
Click Start.
As a result, the bot is activated on your instance.
Disconnect a bot
To disconnect a bot, do the following:
- Navigate to Bot connection page.
- In the Connected section, select a bot to disconnect.
- Click Disconnect.
See the Set up Telegram Swarming Session article to learn how to set up the swarming session group.
Telegram bot for creating tickets
Before using the ITSM bot, ensure the following:
- The user has an active employee record that is not Locked out.
- Verify that the telephone number in Telegram is current and the same as given in the Mobile phone field in the Employee record form. If the telephone number starts with a plus sign in the Telegram account, the telephone number in the Employee record form should also start with a plus sign.
To activate an ITSM bot, do the following:
- Open Telegram.
- In the search bar, enter the name or username of the bot connected to your instance.
- Click Start. The bot will ask you to share your mobile number and initiate a search for your mobile number in the system. The bot may also find a telephone number linked to an employee account that is blocked or inactive in the system.
As a result:
- Successful connection: The bot has found your Employee record with the number provided. The bot setting is finished.
- Error: The bot cannot authorize you because there is no record of an employee with such a mobile phone. Write to the support service and check if your current phone number is in the system.
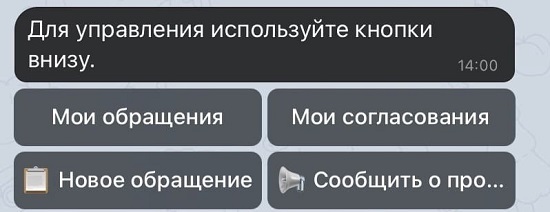
When the connection is established, open the main menu. The following actions are available:
- My tickets – open a list of active incidents and user queries.
- My approvals – open a list of active approval tickets.
 New user query – ask a question, or request a personal consultation.
 Create an incident – report about a problem with services, hardware, or software.
Create a user query
To create a user query via the Telegram bot, do the following:
-
In the main menu, click New user query.
-
The bot will ask you to write down your question.
-
In the text field, briefly describe your problem and the question.
noteThis text will be used as a description and the subject of the user query, but unlike the description, the subject can contain only the first six words.
-
Click the plane icon to send it. The bot will ask you to define the urgency of your question.
-
Define the necessary level of urgency: Low, Medium, High, Critical.
As a result, the user query is sent to your instance. You can continue working with the bot.
Create an incident
To create an incident via the Telegram bot, perform the following steps:
-
In the main menu, click Report a problem.
-
The bot will ask you to describe the problem you have faced.
-
In the text field, briefly describe your problem.
noteThis text will be used as a description and the subject of the incident, but unlike the description, the subject can contain only first six words.
-
Click the plane icon to send it. The bot will ask you to define the urgency of your incident.
-
Define the necessary level of urgency: Low, Medium, High, Critical.
As a result, the incident is sent to your instance. You can continue working with the bot.
Check a ticket state
To check the state and details of your active tickets, complete the following steps:
-
In the main menu, click My tickets. A list of active tickets will appear. Click the link to open the list on the portal if you need.
-
Click the ticket name to see more details. The next message contains the following fields: Number and Subject, State, Description.
In this step, the following options are available:
- Details – click the button to see more detailed information about your ticket. The message will contain the following fields: State, Caller, Subject, Description, Company, Service, and other fields if they are not empty.
- Leave a comment – click the button to create an additional comment, which will be saved in the Activity Feed. Enter your comment and click the plane button .
- My tickets – click the button to see the list of your active tickets.
- Menu – click the button to see the main menu.
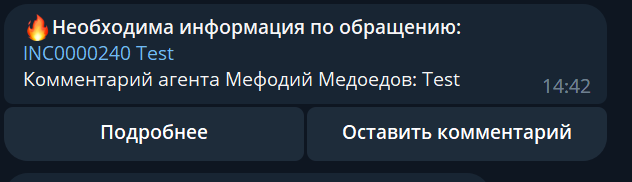
Information needed
When the ticket state changes to Information needed, you will receive a notification message to add information. To do so, click Leave a comment, enter your comment and click the plane button.
The comment is sent, the ticket state changes to Assigned.
Example:
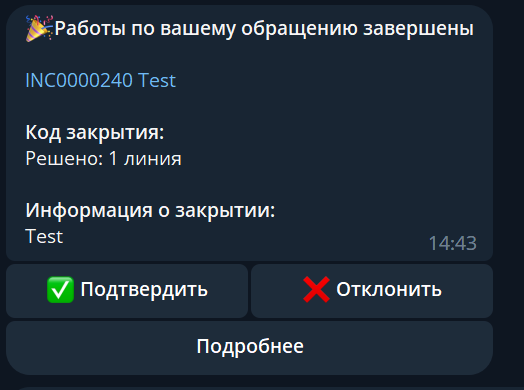
Close tickets
Once the state of your ticket changes to Complete, you will receive a notification message about closing the ticket with the ticket number, closure code and closure information. To close the ticket, accept or decline the result of the work done:
 Accept – click to accept the solution given. You will be asked to evaluate the quality of service and the agent's work. Values of these evaluations are connected to the values of choice options.
- Below Expectations =

- Meets Expectations =

- Above Expectations =

- Below Expectations =
 Reject – click if you are not satisfied with the results. You will be asked to specify the rejection reason. Enter your comment and click the plane button.
Example:
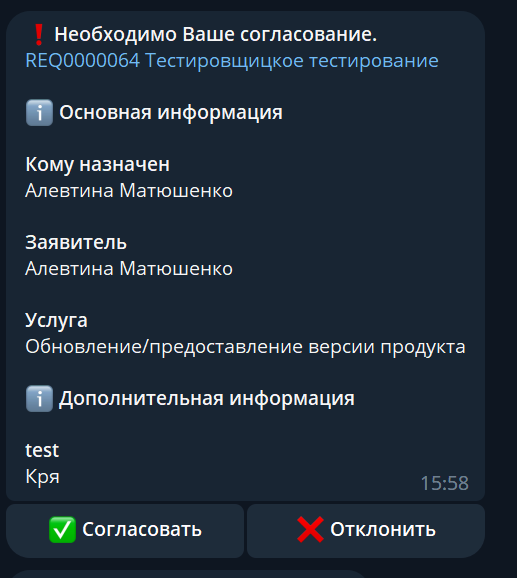
Ticket approval and rejection
You can check your active approval tickets via the ITSM bot. In the main menu, click My approvals. A list of approval tasks will appear. When tickets that require your approval are created, you will also receive a notification message.
To approve a ticket, click ![]() Approve or
Approve or ![]() Reject.
Reject.
- If you reject the ticket, specify the reason. Enter your comment and click the plane button.
Example: