Add Widget to Form
You can add widgets to record forms to gain more functionality or for any other purpose.
To prepare a widget before adding it to a form, follow the steps below:
- Configure widget displayability before adding it to the layout.
- Configure the option schema.
After all preparations are done, you can add a widget to a form. To do so, complete the steps below:
- Open the form you want to add a widget to.
- In the burger menu , select Configure → Form → Layout.
- Add a widget to a form layout.
- Click Save to apply the changes.
Configure a widget
First, you need to configure the specified widget to make it available for adding. To do so, follow the instructions provided in the Widget Displaying article.
Add a widget to a form layout
On the form, select a widget you want to add:
- Click the desired widget in the Available box.
- Drag it or use the buttons to move the widget to the Selected box.
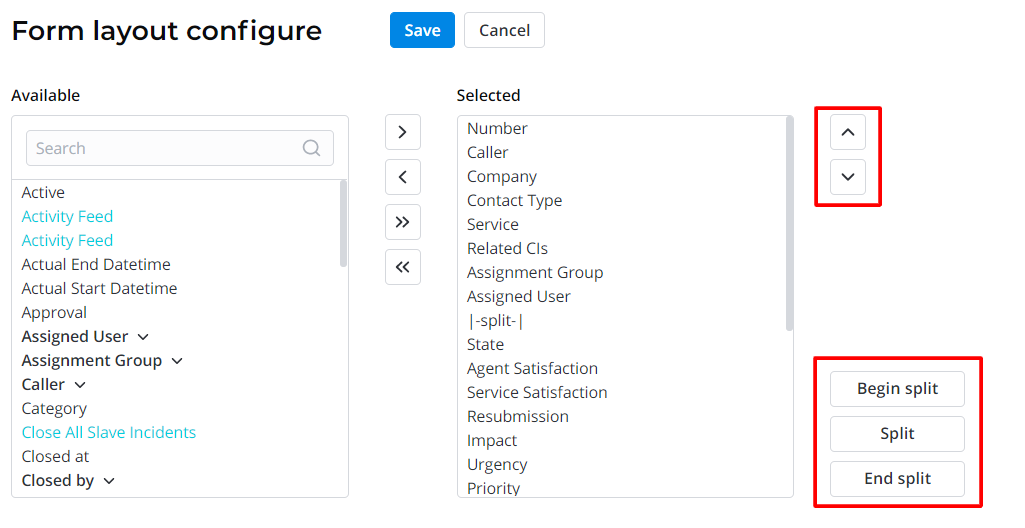
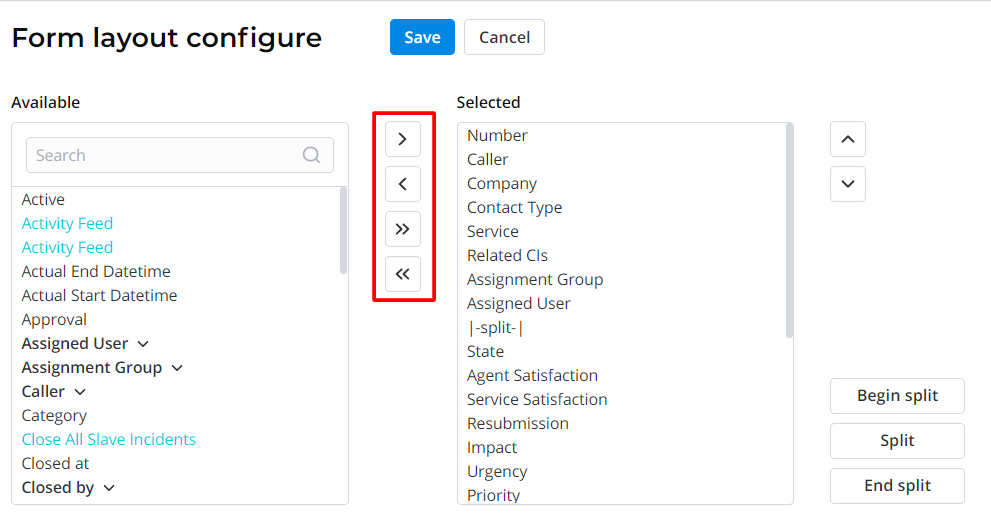 3. Define a widget position on the form with the and buttons. Use splitter elements to create the form structure. You can also drag the items between the boxes, and within a single box, instead of using the buttons.
See the Form Layout article to learn more about form layout configuration.
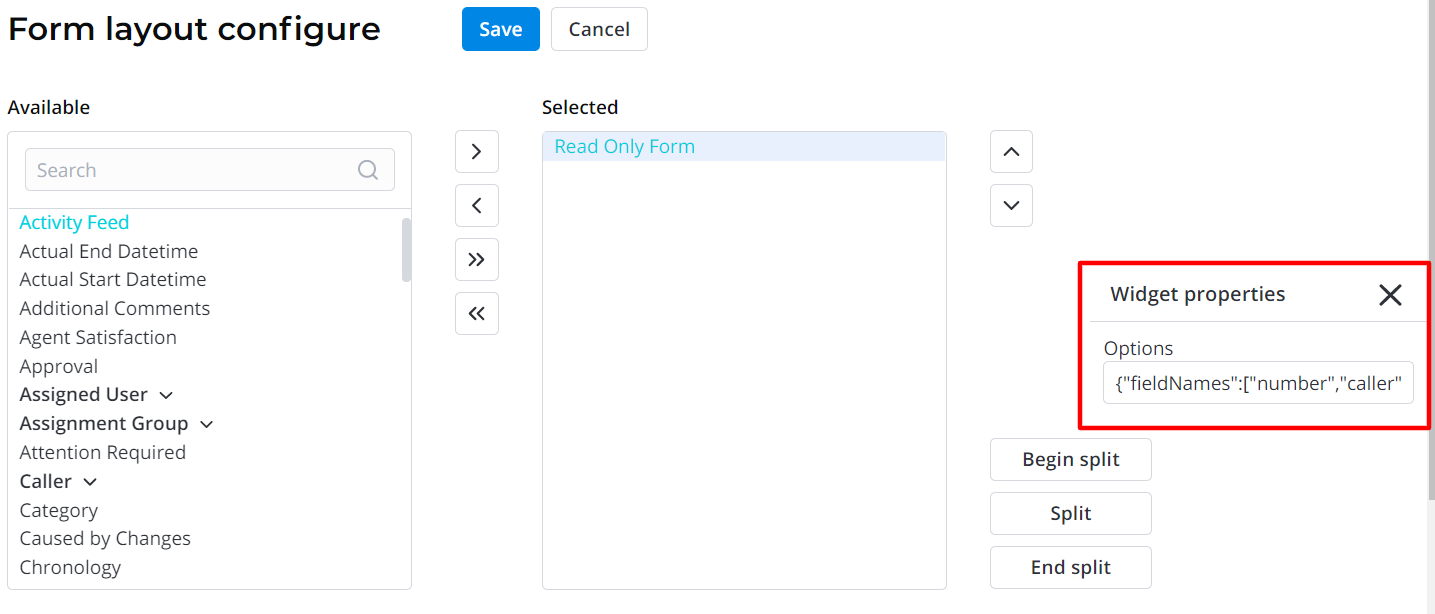
Configure an option schema
Use the Widget Instance window to specify the widget options. Click the widget while configuring the layout to call this window.
See Page Structure to learn more about widget configuration when adding a widget to a page or to a form.
To configure the widget options schema, follow the steps below:
- In the Schema Option Values field, enter the widget options in JSON format.
- Specify the desired widget option values, otherwise, the default values will be applied:
{
    "tableName": "itsm_incident",
    "condition": "state!=10"
}
The widget of each type has common Attributes along with the set of private attributes. See the Portal SimpleTags article to learn more.
- Click Save to apply the changes.