Timesheet
The Timesheet page provides a week-by-week overview of the time spent on tasks and other activities, allows employees to create timecards, and submit them for their manager's approval, and allows managers to approve their subordinate employees' timesheets.
Personal timesheet
To open your timesheet, navigate to Time Entry Management → Timesheet.
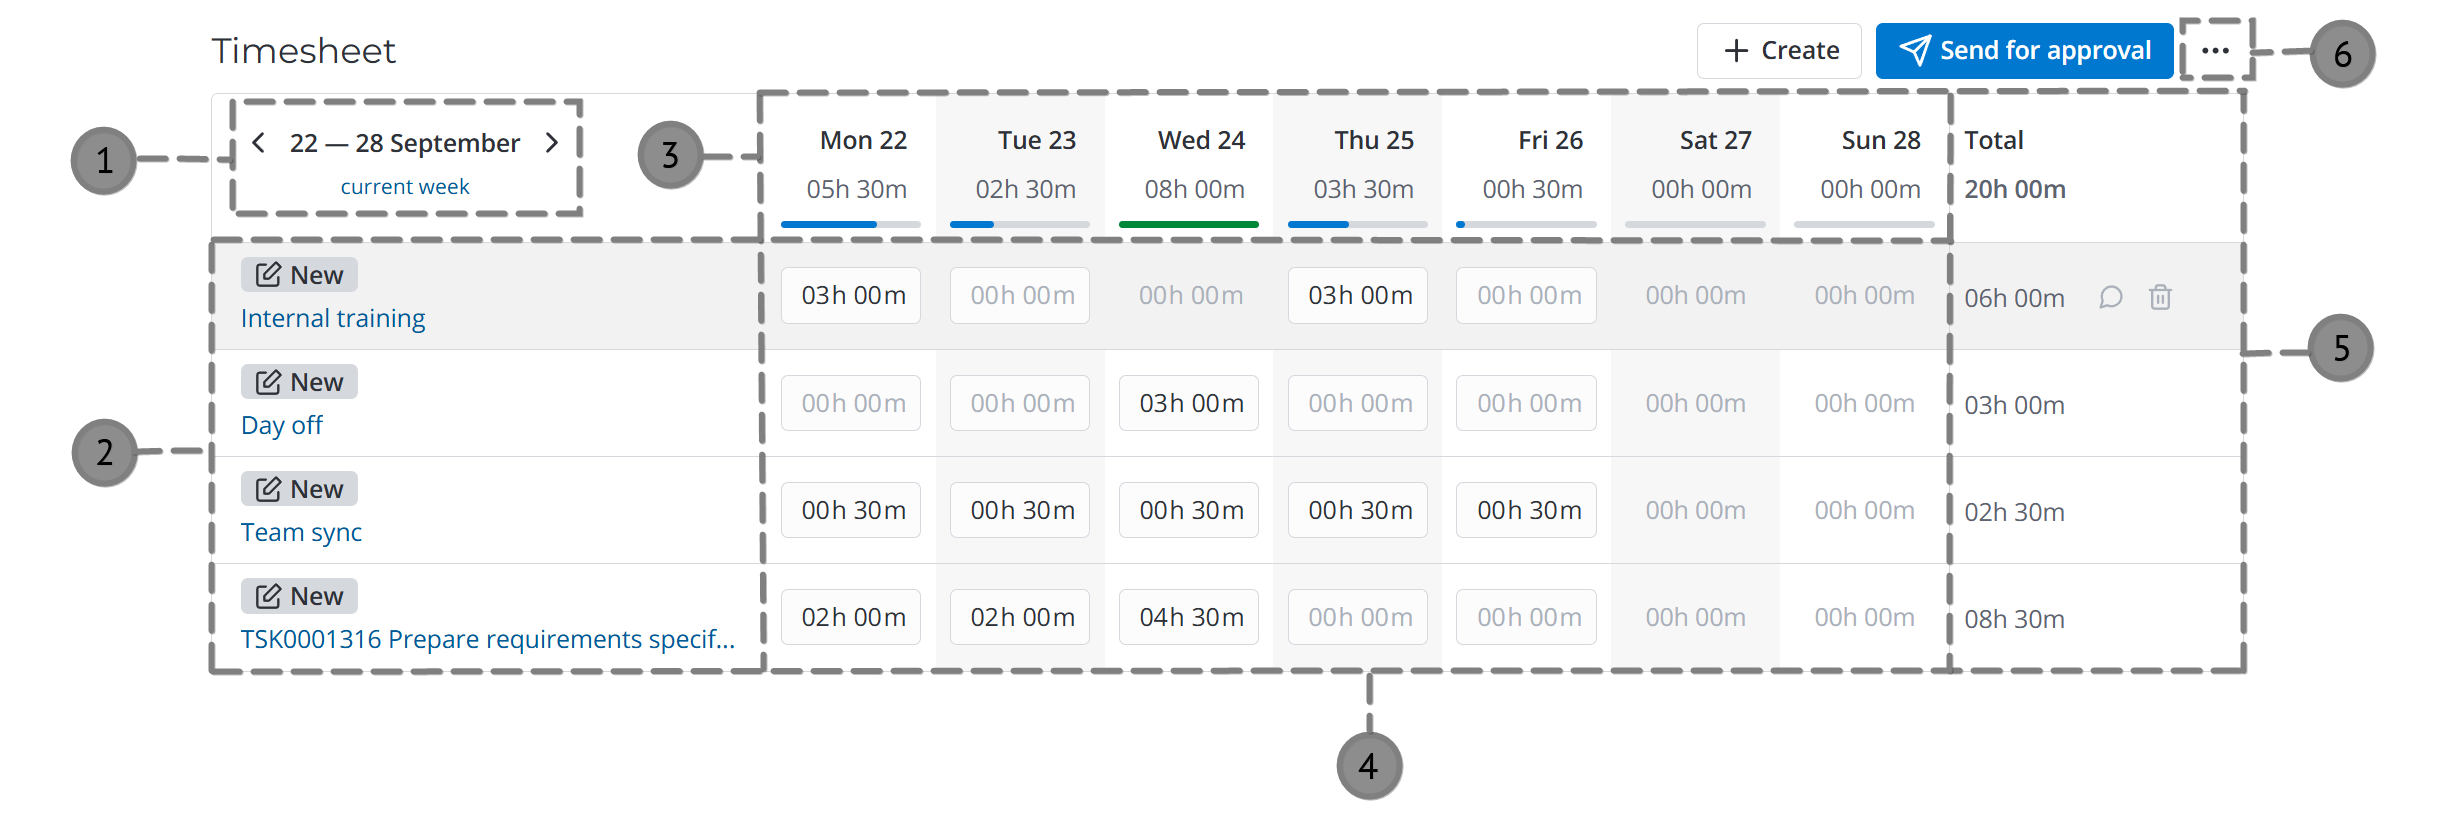
The Timesheet consists of the following parts:
-
Week selection area.
- Click or to view the previous or next week.
- Click the link to return to the current week.
-
Timecards and their approval state.
- If the timecard has the Task activity selected, its title displays the Display name of the specified task record with the link to its form.
- If the timecard has any other activity selected with its type specified, the title displays the selected activity type with the link to its form.
-
Dates and days of week with the total time spent on all tasks within that day.
When filling in the timesheet, a color indicator is displayed under the day of the week:
- Blue – not all of the time from the set time limit according to the work schedule has been spent for the day.
- Green – the entire limit of the set time according to the work schedule for the day has been spent on tasks.
- Red – the limit of the set time according to the work schedule for the day has been exceeded.
The hints that appear when hovering over indicators contain the time left to specify or the overtime work.
-
Time cells.
- Click the time value in the cell to change it.
- Click the dialog icon (appears when hovering over the cell) to leave a comment to the time entry. After a comment is added the corresponding cell is marked with a green triangle in the top right corner.
-
Total time spent on all tasks in general and on each task separately.
- Click the dialog icon (appears when hovering over the row) to leave a comment to the timecard as a whole.
- Click the trash icon (appears when hovering over the row) to delete the time card with all its related time entries.
-
Click three dots to open the action menu with the following options: Hide non-working days / Show non-working days – click to remove or return non-working days to the timesheet.
Create a timecard
To create a timecard in the timesheet, complete the steps below:
-
Click Create in the top right corner of the Timesheet.
-
By default, Task is selected in the Activity field. Specify the task you are working on in the Task field or select another activity. The Task field is then replaced with the Activity type field that you can use to more precisely classify the activity performed.
-
Click to select an existing activity type.
-
Click to create a new one:
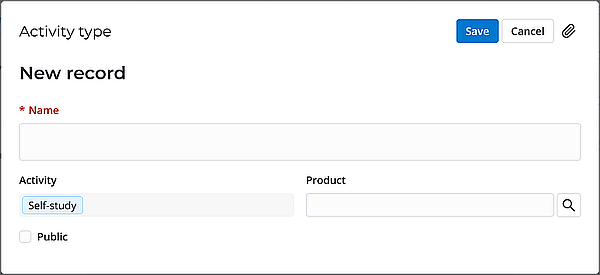
Fill in the fields according to the description and click Save.
-
-
Click Save.
On any given week, you can only create a single timecard:
- for a specific task
- for an activity without the activity type specified
- for a specific activity type
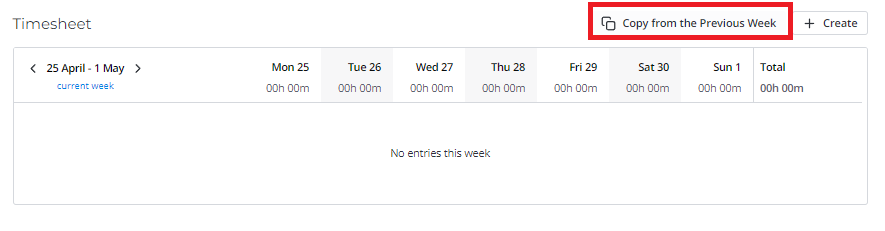
Copy timecards
When you move to the next week, you can copy the timecards from the previous week. Click Copy from the Previous Week.
The timesheet will display all activities in the New state if they are copied by a user with the admin role.
The following conditions must be met if the activities are copied by a user without the admin role:
- the Active checkbox is selected on the Activity form,
- the Active checkbox is selected on the Activity type form,
- the Public checkbox is selected on the Activity type form. The condition is not applicable if the current user is the Activity type creator.
The following attributes will not be copied:
- comments
- time
After activities are copied, the message The timesheet is copied pops up.
Send timesheet for approval
Click Send for approval, the timesheet will be sent to the manager for approval. You will see a toast message, and the states of activities will change from New to Pending approval.
When you send a timesheet for approval:
- empty timecards are deleted (the system displays a corresponding warning),
- comments to timesheet cells without the time spent specified are deleted.
The manager receives a general notification if the number of their subordinates is equal to or greater than the value specified in the wtm.notification.group_minimum property. Otherwise, the manager receives separate notifications for each subordinate.
Then, the manager can review all the timesheets and timecards. If the manager approves or rejects them, the subordinates receive corresponding email notifications.
The manager and subordinate can exchange comments on timecards, getting notifications when doing so.
The subordinate can view the manager's comments. To do so, click next to the state label to open the Timecard chat and view the manager's comments.
To send the timesheet for approval again, click Send for approval.
If you have no manager, timecards will be approved automatically after you click Send for approval. The following message pops up: The timesheet for {date} was submitted.
Withdraw from approval
The timecards in the Pending approval state cannot be changed. If you need to correct the information entered in such a timecard, you must first withdraw its approval. You can withdraw specific timecards or the whole timesheet.

-
To withdraw the whole timesheet, click Withdraw in the upper-right corner of the page.
If your manager has already approved one or more timecards, a modal window will appear where you must select whether to withdraw all the timecards or only those pending approval.
-
To withdraw a single timecard, click next to the total time spent in the rightmost column of the timesheet. The button appears when hovering over a row.
All withdrawn timecards change their state to New.
Subordinates' timesheet
As a manager, when a subordinate submits their timesheet for approval, you must approve or reject the timecards included in the submitted timesheet. To do so, complete the following steps:
-
Navigate to Time Entry Management → Subordinates Time Entries → Subordinates Timesheets
The list opens with all timesheets submitted for approval by your subordinate employees, grouped by employee.
-
Open the Timesheet you need to approve.
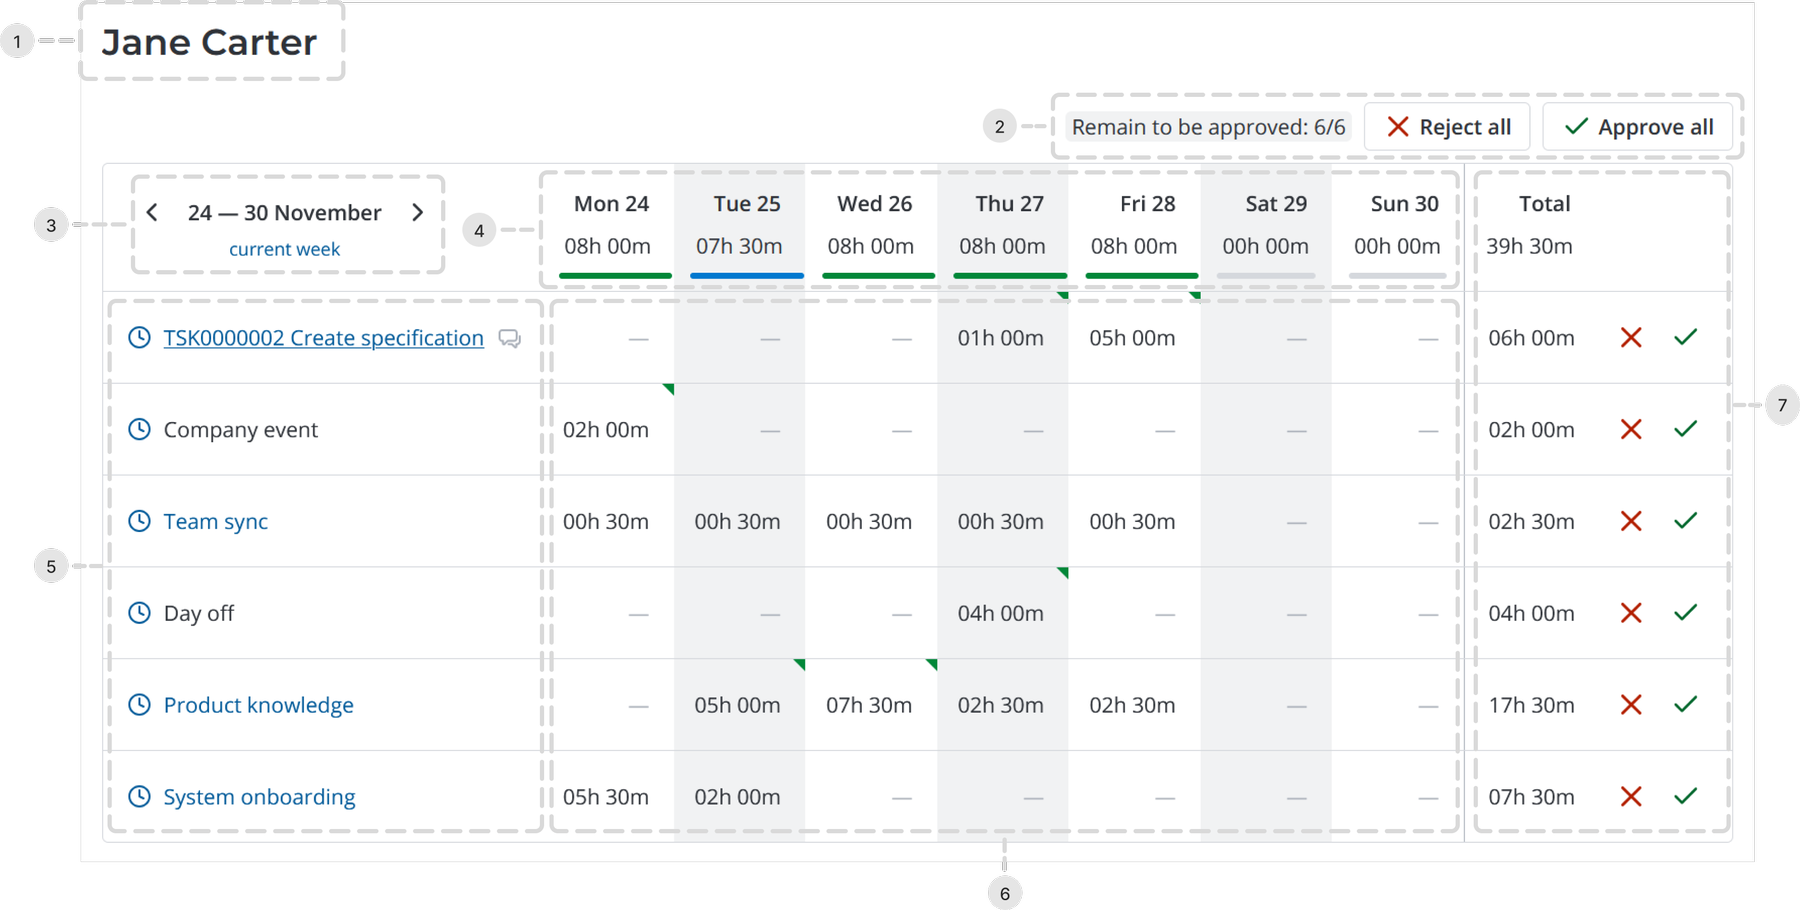
The subordinates' timesheet consists of the following components:
-
First and last name of the employee who has sent the timesheet for approval.
-
Timesheet approval area. The total number of timecards is shown here as well as the number of cards that remain to be approved or rejected.
-
Click Reject all or Approve all, to reject or approve all timecards included in the timesheet.
If one or more timecards has already been approved or rejected, the buttons change to Reject remaining and Approve remaining that allow to apply a corresponding action to all timecards in the timesheet that are still pending approval.
-
When several timecards are rejected, the same comment is added to all of them.
-
-
Week selection area.
- Click or to view the previous or next week.
- Click the link to return to the current week.
-
Timecards and their approval state.
- If the timecard has the Task activity selected, its title displays the Display name of the specified task record with the link to its form.
- If the timecard has any other activity selected with its type specified, the title displays the selected activity type with the link to its form.
- The timecard approval state is indicated to the left of its title:
- – approval pending
- – approved
- – rejected
- Click the icon that appears when you hover over a row to open the Timecard chat, where you can see your subordinate employee's comments to the timecard and leave your own comments.
-
Dates and days of week with the total time spent on all tasks within that day.
When filling in the timesheet, a color indicator is displayed under the day of the week:
- Blue – some of the time from the time limit according to the work schedule has not been spent for the day.
- Green – the entire time limit according to the work schedule has been spent for the day.
- Red – the time limit according to the work schedule has been exceeded for the day.
-
Time cells.
- If the employee has left comments to the time entry for a specific day, the corresponding cell is marked with a green triangle in the top right corner. Put the pointer over the cell to view the comment.
-
Total time spent during the week and the buttons to approve or reject specific timecards.
-
If the employee has left a comment to a timecard, the corresponding cell with the total value is marked with a green triangle in the top right corner. Put the pointer over the cell to view the comment.
-
Click to reject a specific timecard.
In the modal window that opens, specify the rejection reason and click Reject.
Click again to return the timecard into the Pending approval state. Your comment will be deleted.
-
Click to approve a specific timecard.
Click again to return the timecard into the Pending approval state.
-