Attachments
SimpleOne supports attaching files to existing or newly created records. You can attach files to a record directly, use the attachment window or an image field. This article describes how to use these interface elements to add and manage attachments.
Attachment window
The attachment window is the main interface to upload and manage files. The attachment window can be accessed by clicking the paper clip icon normally displayed in the upper right corner of the main area.
The paper clip icon shows the number of files attached, if any: ![]()
If a record has no files attached to it, the attachment window looks as shown in the screenshot below:
![]()
Upload files
Upload files in one of the following ways:
- Drag files into the window.
- Click Upload from your device and add files via the file manager.
- Copy and paste files from the file manager.
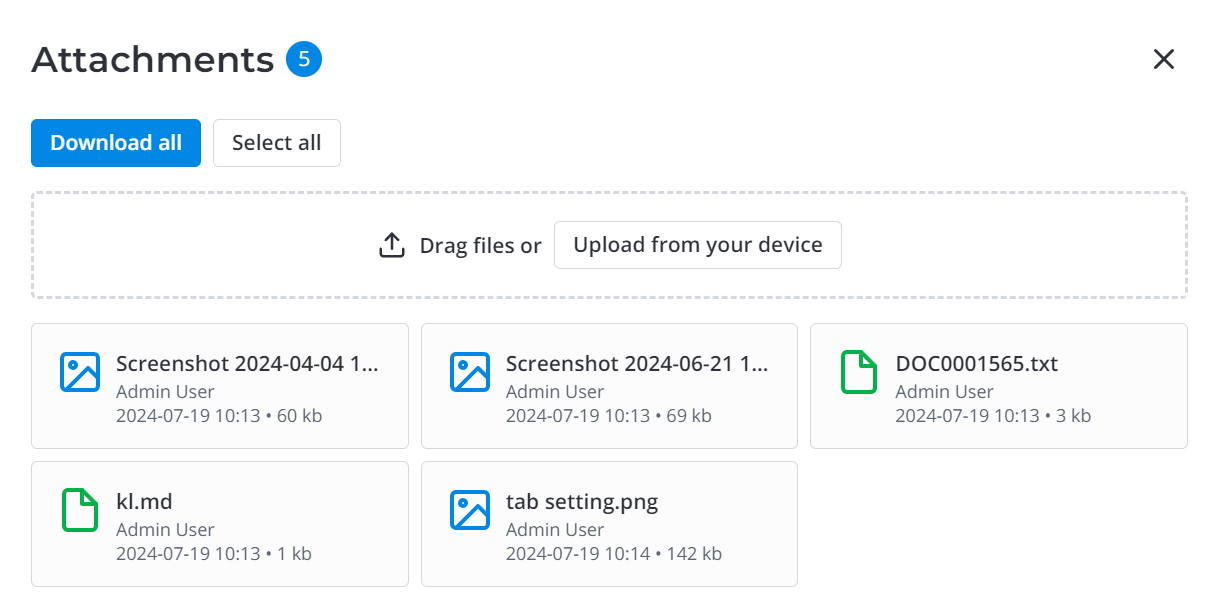
Once you upload a few files, more options become available in the attachment window:
The available buttons are different if only one file is uploaded:

Add more files
Add more files in one of the following ways:
- Drag files into the attachment window.
- Click Upload from your device and add files via the file manager.
- Copy and paste files from the file manager.
Download files
Download files in one of the following ways:
- If there is one file, click Download.
- If there are multiple files:
- To download a single file, move the pointer to the file and click the download icon .
- To download a few files, move the pointer to a file you need to download, click the three-dots icon , and then select Select. Repeat for other files you need to download. Click Download (x) to download the selected files.
- To download all files, click Download all. The Download all button is only available if no files are selected.
Delete files
Delete files in one of the following ways:
- If there is one file, click Delete.
- If there are multiple files:
- To delete a single file, move the pointer to the file and click the delete icon .
- To delete a few files, move the pointer to a file you need to delete, click the three-dots icon , and then click Select. Repeat for other files you need to delete. Click Delete (x).
- To delete all files, click Select all and Delete (x).
Portal attachments
Some records may have an attachment area. You can use this area to upload and manage attachments without leaving the record, or click Upload from your device to open the attachment window. Note that if a record has an attachment area, the paper clip icon not displayed.

Upload files
Upload files in one of the following ways:
- Upload files by directly dragging them into the attachment area.
- Click Upload from your device to upload files using the attachment window.
- Add files from the clipboard directly on the form by using Ctrl + V shortcut while hovering over Drag files area.
When multiple files are attached to a record, only the last three files uploaded are displayed.
Once a few files are uploaded, more options become available in the attachment area:
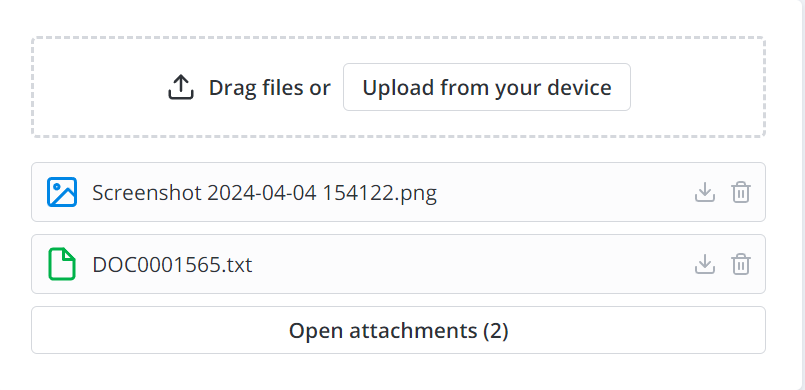
Add more files
Add more files in one of the following ways:
- Drag files into the attachment area. This opens the attachment window.
- Click Upload from your device and add files via the file manager.
- Click Open attachments (x) and add files using the attachment window.
Download files
Download files in one of the following ways:
- If the file you need to download is visible, click the download icon on its badge.
- If there are more than three attachments and the file or files you need to download are not visible, click Open attachments (x) and use the attachment window to download the files you need.
Delete files
Delete files in one of the following ways:
- If the file you need to delete is visible, click the delete icon on its badge.
- If there are more than three attachments and the file or files you need to delete are not visible, click Open attachments (x) and use the attachment window to delete the files you need.
Image field
An image field is a special type of field used to attach an image to a record. You can use it to attach a profile photo to a user record, or a screenshot to a support ticket.
You can upload image files in the following formats: jpg, png, gif, webp, bmp, svg, and ico.
An empty image field is represented on a record as the paper clip icon below the field title:

Click the paper clip icon to open the image attachment window:
![]()
Upload an image
You can upload an image in one of the following ways:
- Drag the image file into the window.
- Click Upload from your device and add an image via the file manager.
- Copy and paste an image file from the file manager.
- Paste an image from the clipboard by pressing Ctrl + V (Windows) or Cmd + V (Mac) on your keyboard.
Once an image is uploaded, the Image attachment window closes and an image thumbnail appears in the image field:

Additional options are now available.
Display an uploaded image
Click on the image thumbnail to display it in full size.
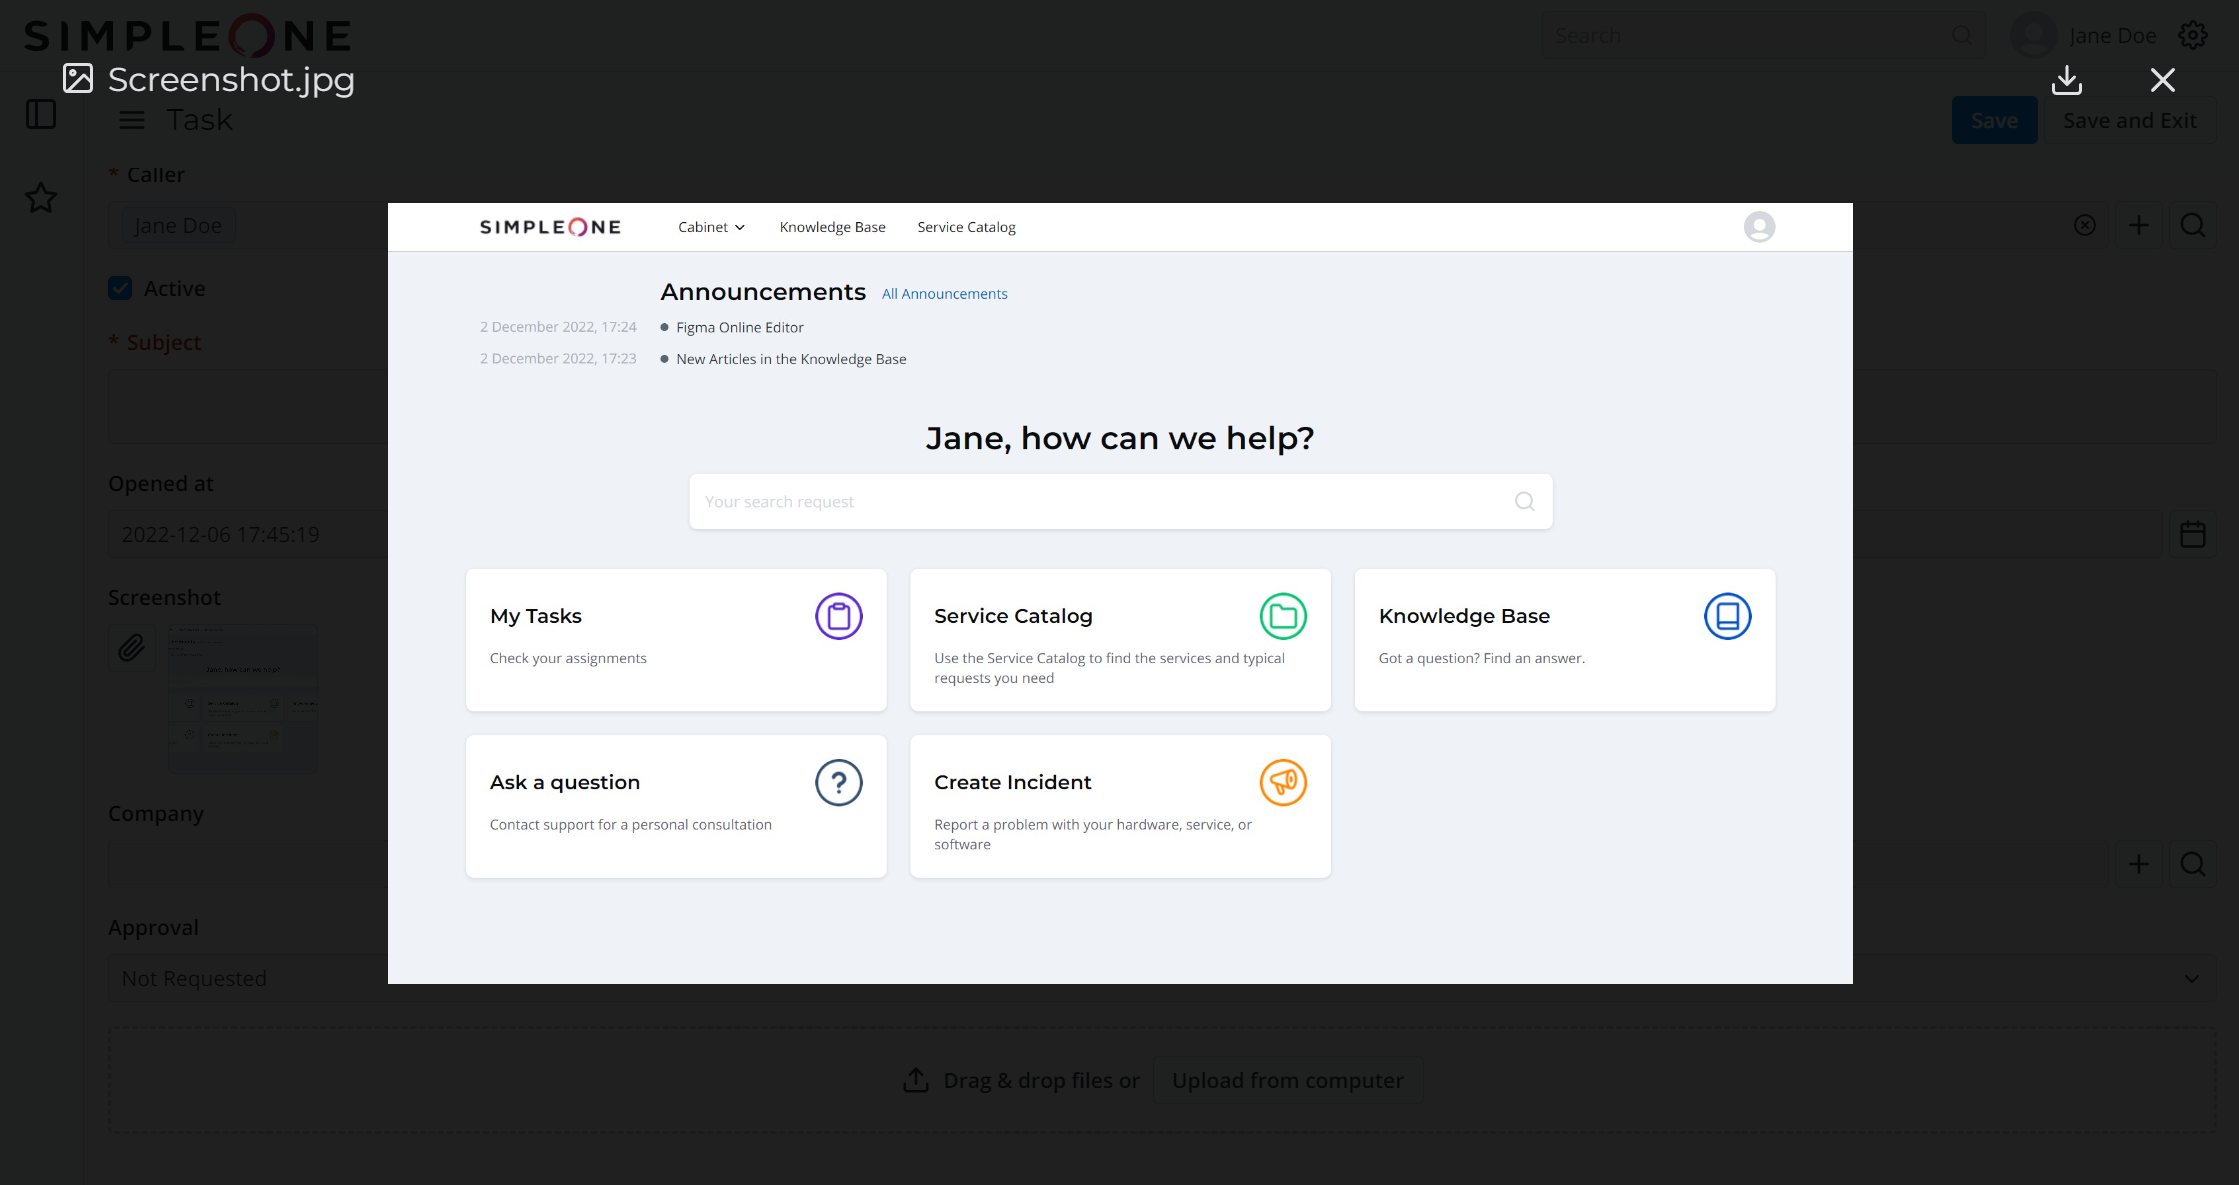
- Click the download icon to download the image.
- Click the icon or anywhere outside the image to return to the record.
Download, delete or replace an image
To download or delete the uploaded image or replace it with a new one, open the image attachment window again:
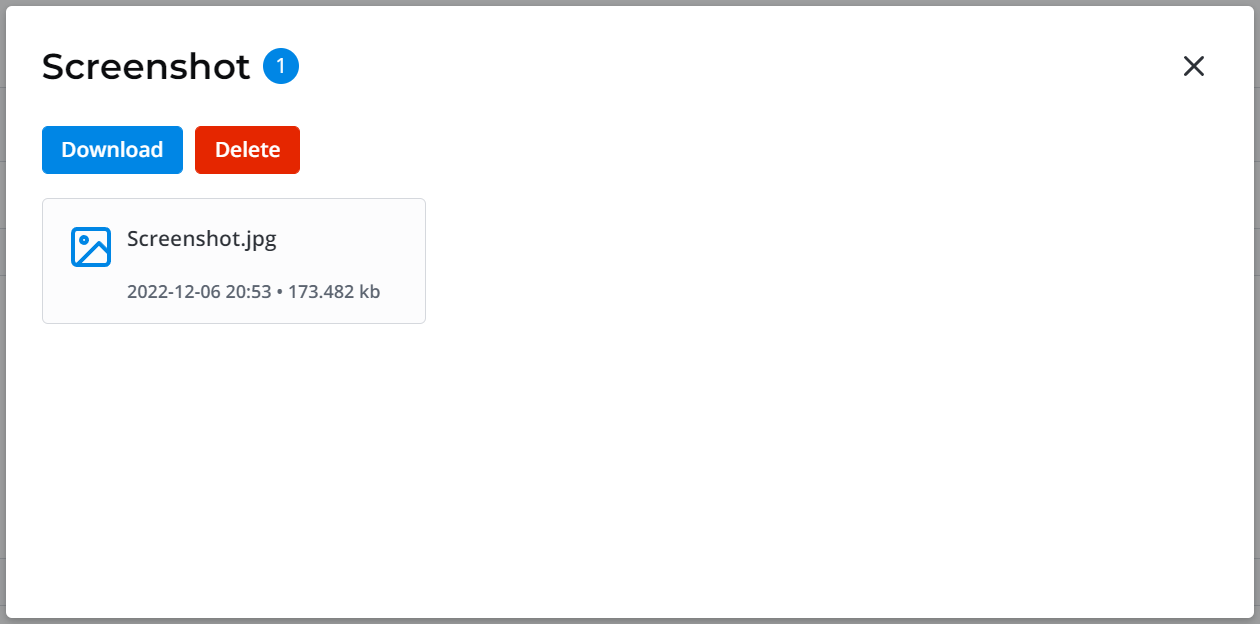
- To download the image, click Download.
- To delete the image, click Delete.
- To upload a new image, first delete the existing one. Alternatively, you can paste an image from the clipboard to replace the previously uploaded image.
- To display the image in full size, click the file badge.
The download , delete , and display options are also available via the three dots menu .