Static User Information SA Widget
SimpleOne provides several widgets for displaying read-only information on user queries, incidents, problems, requests, and change requests forms. One of them is the Static User Information SA widget.
This widget retrieves information from the record referenced in the Caller field.
This widget retrieves information from the current task record. For more information on the displayable fields, read the Configure the widget fields section.
Widget appearance

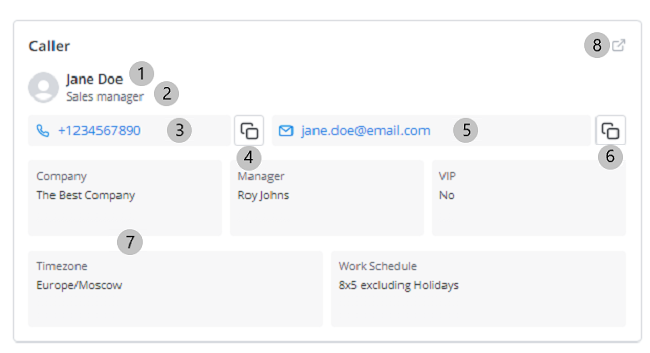
- User's first and last name.
- Job title. This field is hidden if the corresponding column in the user's record is empty.
- Phone number. This field is hidden if the corresponding column in the user's record is empty.
- Phone number copy button. Click the button to copy the phone number into the clipboard. A corresponding toast message appears.
- Email address. This field is hidden if the corresponding column in the user's record is empty. Click the email address to send the caller a message using the default email application on your device.
- Email address copy button. Click the button to copy the email address into the clipboard. A corresponding toast message appears.
- Fields with available information. You can configure the displayed fields and their layout.
- User's profile link. Click it to open the user's record in the User (user) table.
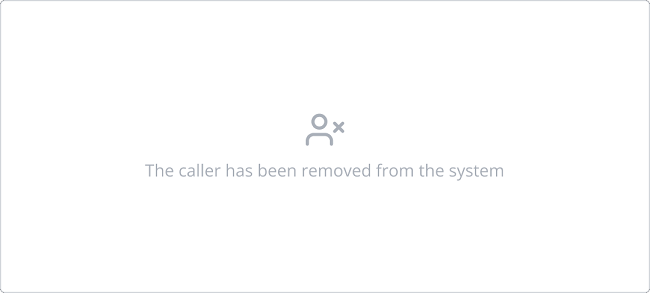
If the caller was removed from the system, the widget takes the following view:

Add the widget to a form
To add the Static User Information SA widget to record forms of a specific table, perform the following steps:
- Open the table form.
- In the burger menu , select Configure → Form → Layout.
- From the Available box, move the Static User Information SA widget to the Selected box.
- Click Save.
Configure the widget fields
The fields displayed in the Static User Information SA widget are organized into rows and columns. The rows can have different number of columns. Each row, regardless of the number of the columns it has, takes the full width of the widget. If a field has no value, the not set placeholder is displayed in the corresponding column.
To change the displayed fields and their layout, perform the following steps:
- In the burger menu of the form where the widget is located, go to Configure → Form → Layout.
- In the Selected box, select the widget you need to configure. А window with the Schema option values field appears on the right.
- Specify the system names of columns you need to include in the widget in the following format.
{
    "fields": [
        ["timezone_id", "date_of_birth", "location", "language_id"],
        ["business_phone", "middle_name", "unit"]
    ]
}
- Click Save.
As a result, the widget has:
- four columns in the first row with the Timezone, Date of birth, Location, and Language fields.
- three columns in the second row with the Business phone, Middle name, and Unit fields.
Configure widget height
You can set the minimal height of the widget in pixels. Notably, the minimal height cannot be less than the height of displayed elements.
To set the minimal height, complete the following steps:
- Navigate to a table record showing the widget.
- In the burger menu , select Configure → Form → Layout.
- In the Selected box, click the widget name to open the Widget instance window.
- In the Schema option values field, set the minimal height of the widget using the minHeight property as shown below.
{
    "minHeight":"600px",
    "fields": [
        ["timezone_id","date_of_birth","location","language_id"],
        ["business_phone","middle_name","unit"]
     ]
}
- Click Save to apply the changes.