CRM Customer Contact Information
The CRM Customer Contact Information widget is used on the forms of the B2B CRM application to display crucial information about the contact related to a record in the agent interface.
By default, the widget is available on the forms of the following tables:
- Partnership Applications (crm_partnership_application)
See the Add Widget to Form article for the information on how to add a widget to a form.
Widget interface
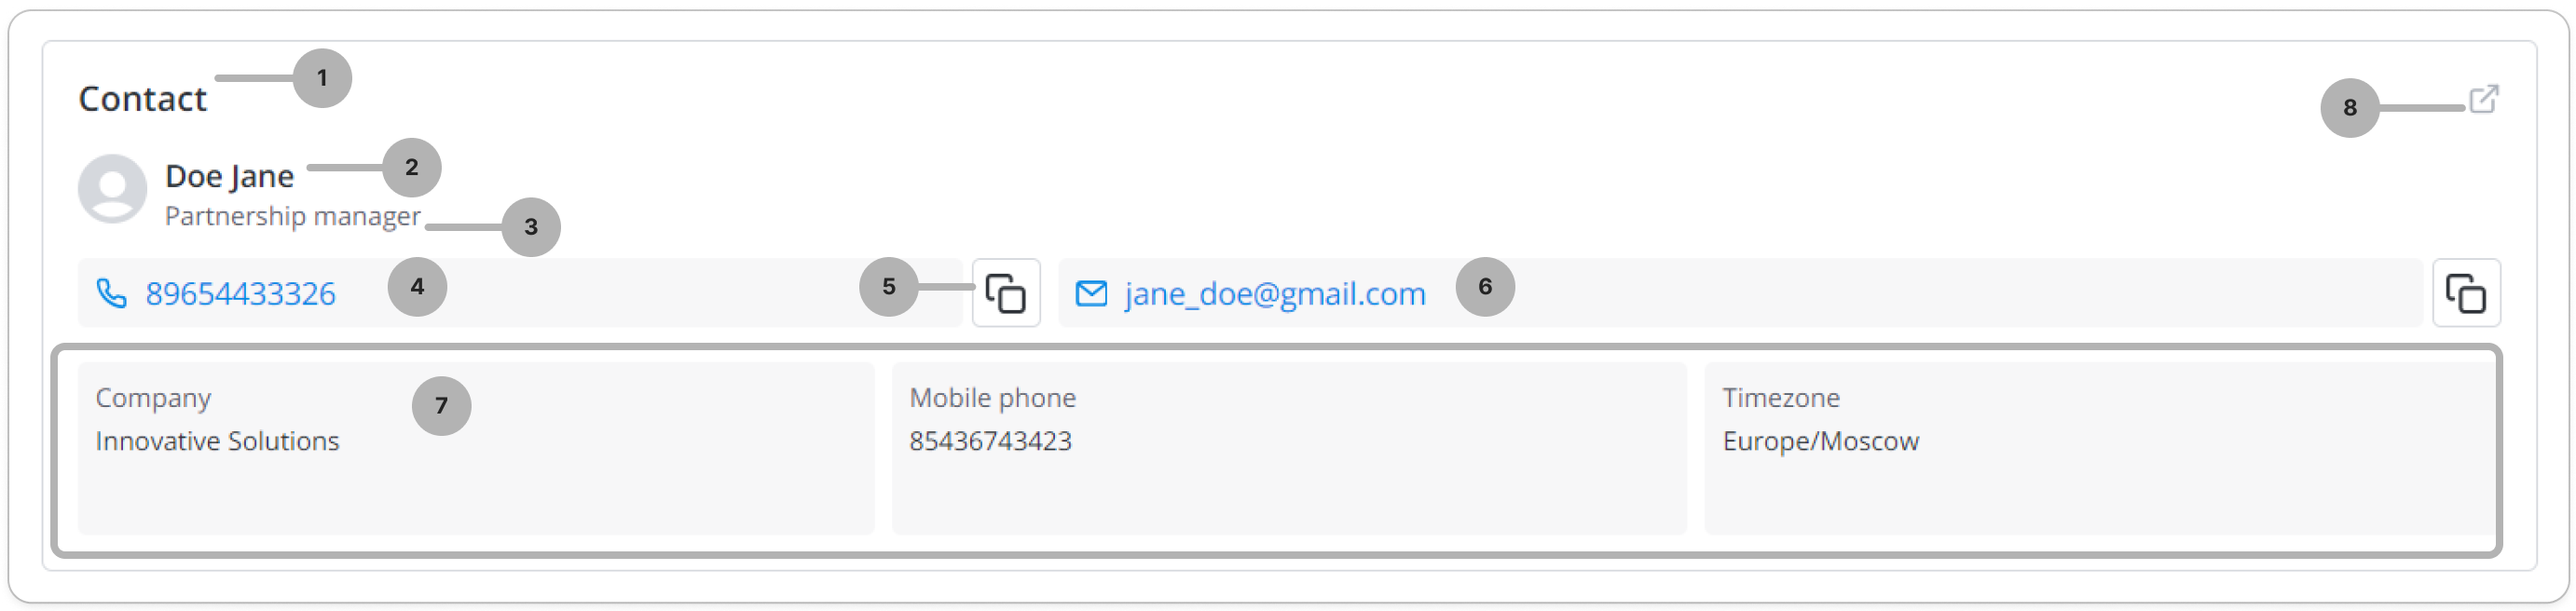
- Widget title. You can change it by editing the translations of the
/record/source_message/172545641008578738source message. - First and second name of the contact.
- Job title of the contact.
- Contact work phone. Click it to select an application and call.
- Phone number and email copy button. Click to copy the phone number or email to clipboard.
- Contact email. Click to write a message.
- Widget fields.
- Contact record link. Click to open the contact record in a new tab.
If the field that is supposed to contain the contact record is empty, the widget is displayed as follows:

Configure the widget
The fields displayed in the CRM Customer Contact Information widget are organized into rows and columns. The rows can have different number of columns. Each row, regardless of the number of the columns it has, takes the full width of the widget.
To configure the values of the widget options, complete the following steps:
-
In the burger menu of the form where the widget is located, select Configure → Form → Layout.
-
In the Selected box, find the widget you need to configure. Click the icon to the right of the widget title.
-
In the Configure the value of the widget options modal window that appears, specify the widget parameters in JSON format.
Configure the value of the widget options{
"fields":
[
["company","certificate","timezone"],
["phone", "phone_second"]
],
"userField":"existing_contact_id"
}- fields – the list of widget fields. You can arrange fields in rows. To do so, you need to present each row as an array containing the system names of the fields to be included in the row. The number of rows and fields in a row is not limited.
- userField – the system name of a field in the table to the form of which the widget is added. This field must contain a reference to a record in the Customer Contact (crm_customer_contact) table or its child table for the data of this record to be displayed in the widget.
-
Click Save.
As a result, the widget has:
- three columns in the first row with the Company, Certificate and Timezone fields.
- two columns in the second row with the Mobile phone and Mobile phone 2 fields.