Partner Portals
You can create a partner portal for each sales direction and limit access to it. The portal will only be available to the accounts of contacts related to a Valid partnership agreement created for a partnership program of the same sales direction as the portal. The system will redirect the employees of other directions to their corresponding portals or to the self-service portal. That is, it is impossible for them to access the portal of another direction.
Create a partner portal
Role required: admin.
To create a partner portal, complete the following steps:
- Navigate to CRM → Settings → Sales Directions.
- Find the required sales direction in the list and open its form.
- In the burger menu , click Create partner portal.
- Fill in the Path name field. This path name will be used to open the portal.
- Click Create.
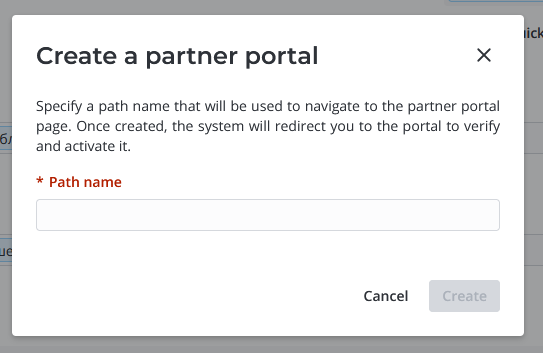
The system will redirect you to the created portal form, where you can configure the portal structure and activate the portal.
Configure access to the portal
Role required: admin.
To authorize in partner portals, users must:
- have an account in the system.
- be specified as a contact in a Valid partnership agreement of the particular sales direction.
To provide access to the portal for the users, complete the following steps:
- Ensure that the portal record is Active.
- Ensure there is a partnership agreement in the Valid state created for a partnership program of the same sales direction as the portal.
- Activate the portal context. To do so, navigate to Portal Structure → Context Rules → Portal Contexts. The context is created automatically after the creation of the portal. Open the record created for the required sales direction, select the Active checkbox and save the changes.
- Check the user criteria. To do so, navigate to User Administration → User Criteria. Find the criterion that was automatically created for your portal and open its record. Ensure that:
- The Active checkbox is selected;
- The Users field contains the accounts created for the contacts specified in the partnership agreement. The new employees are added to the criteria automatically after the validation of a new partnership agreement or adding new contacts to an already valid agreement.
If the field is empty, ensure that:
- The portals.portal_context.enable system property is set to true.
- There is a Valid partnership agreement for the required partner (see point 1).
- The contacts related to the partnership agreement have Employee (employee) accounts in the system. To create an account, open the record of a contact that does not have an account and click Create account.
Use a partner portal
On the main page of the portal, you can register opportunities. Users can monitor the state and related information for the opportunities registered both by you and other employees in your company. The agents of the vendor company work on each registration and qualify them as a lead. The qualified registrations are added to the Opportunities list on the portal.
Create opportunity registration
Opportunity registration is a platform tool that the partner-company employees can use to submit a query without contacting a particular manager of the vendor company. All created registrations are processed by the agent.
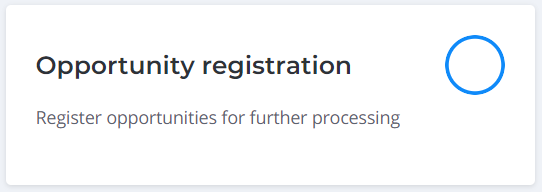
To register an opportunity, do the following:
- Navigate to the portal and click Register an opportunity.
- Fill in the fields.
- Click Save.
Opportunity registration form fields
| Field | Mandatory | Description |
|---|---|---|
| Name | Y | Specify a name for the opportunity. |
| Service/Product | N | Specify the service or product that the opportunity relates to. |
| New company | N | Select the checkbox if you want to register an opportunity with a new company. By default, the checkbox is cleared. |
| Existing company | Y/N | Select a company from the list of existing companies by clicking the magnifier icon. The field is hidden from the form and is not mandatory if the New company checkbox is selected. |
| Company name | Y/N | Specify the new company name. The name must be unique compared to the company names existing in the system. The field is displayed on the form and is mandatory if the New company checkbox is selected. |
| Company website | Y/N | Specify the new company website address. The address must be unique compared to the addresses existing in the system. The field is displayed on the form and is mandatory if the New company checkbox is selected. |
| Company TIN | Y/N | Specify the new company TIN. The TIN must be unique compared to the TINs existing in the system and contain 9, 10, or 12 digits. The field is displayed on the form and is mandatory if the New company checkbox is selected. |
| New contact | N | Select the checkbox if you want to associate the opportunity registration with a new contact. By default, the checkbox is cleared. |
| Existing contact | Y/N | Select a contact from the list of existing contacts by clicking the magnifier icon. The field is hidden from the form and is not mandatory if the New contact checkbox is selected. |
| First name | Y/N | Specify the new contact first name. The field is displayed on the form and is mandatory if the New contact checkbox is selected. |
| Last name | Y/N | Specify the new contact last name. The field is displayed on the form and is mandatory if the New contact checkbox is selected. |
| Middle name | N | Specify the new contact middle name. The field is displayed on the form if the New contact checkbox is selected. |
| Contact email | N | Specify the new contact email. The field is displayed on the form if the New contact checkbox is selected. |
| Contact phone number | N | Specify the new contact phone number. The field is displayed on the form if the New contact checkbox is selected. |
| Partner representative | Y | Select an employee representing the partner. |
| Budget | N | Describe price expectations and project budget. |
| Estimated closure date | N | Select an estimated closure date. |
| Customer requirements | N | Describe the customer's requirements. |
| Additional comments | N | Specify additional information that will be added to the Additional Comments tab of the Activity Feed |
There is the attachments widget on the form. Use it to attach documents related to the opportunity registration.
View registrations and opportunities
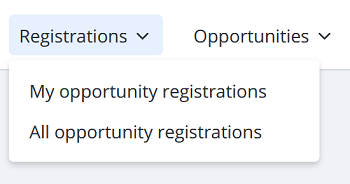
Partners use the portal to view the state and following information on the created opportunity registrations. To do so, navigate to the Registrations tab and, in the drop-down list, select one of the following options:
- My opportunity registrations to view all registrations created by the current user.
- All opportunity registrations to view registrations created by all employees of the company. All registrations of their company are available only to the contacts in which the Show all opportunities of the partner checkbox is selected. If the checkbox is not selected, the content of this tab is identical to My opportunity registrations.
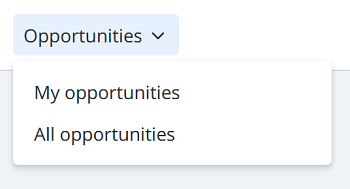
To view the qualified records, open the Opportunities tab and select one of the following options:
- My opportunities to view all opportunities qualified from the registrations created by the current user.
- All opportunities to view all opportunities qualified from the registrations created by all employees of the company. All opportunities of their company are available only to the contacts in which the Show all opportunities of the partner checkbox is selected. If the checkbox is not selected, the content of this tab is identical to My opportunities.
There is the Activity Feed widget on the opportunity registration and opportunity forms. The users can leave Additional Comments there.
Use the filters to search for the records by their state, date and other record form values.